Photo Gallery :: Tank setup completed. (The turtles have landed)

The place to post your photos and pictures.
Winter Photo Contest Winner :mrgreen:

Post Posted: Tue Jan 23, 2007 9:53 pm   

Yes indeedy. I noticed that Sparky who is @ 3.3 inches, has nails and tail that seem to have grown overnight! i thought of Big Daddy when I saw it. Spike has a little tail and nails so far, but of course anything could happen still in the next inch.
2 RES-Sparky M 6.0 and Spike F 9.0
1 Beardie- F Nubbin
1 Pictus Gecko- F Necko
6 Fire Bellied Toads-3 M 3 F
User avatar
scripta_elegans
Senior Member
 
Posts: 1938
Joined: Jul 30, 2006
Location: Iowa

Post Posted: Wed Jan 24, 2007 11:07 am   

GreyGoose, I just wanted to tell you that I love your turtles' setup & keep coming back to enjoy the pictures. It's a perfect turtle playground! Lovely job!!!! 8)
Kristin's Pond! Starring:

RES = "Sheba", 21+ yrs. old
African Clawed Frog = "Prog", 10 yrs old
& "Kristin" as Momma
User avatar
industrial_girl_2000
Senior Member
 
Posts: 3232
Joined: May 11, 2006
Location: Farmington Hills, MI

Post Posted: Wed Jan 24, 2007 12:00 pm   

Beaker says "Thanks!"

Image

Big Daddy doing a butt-check: :roll:

Image

I've got a couple weeks off, so I'm working on a 55 gal. version of the big tank. And I shall call it........"MINI ME!" :)

Image

Best of all the tank and stand was free! I was helping my ex-girlfriend's dad clean out the basement of her old condo that she's selling.....He was going to throw it out!!!! It has a small chip in one of the corners, but it's nothing I can't repair.
User avatar
grey goose
Senior Member
 
Posts: 1941
Joined: Jul 12, 2006

Post Posted: Wed Jan 24, 2007 8:42 pm   

Make sure and take lots of pics and don't skip any details. Now you are making me really itch to get a jump on our next tank (probably a 50g or 65g) but I must wait until we move. I really like the look of these new ramps, how much would you charge to make and ship a set?
cusm
 
Posts: 24
Joined: Dec 18, 2006
Location: Oklahoma City

Post Posted: Wed Jan 24, 2007 8:46 pm   

Wow! How unbelievably lucky you are! I mean he could have sold it easily for a $100. At least I'd buy it at that price. Is it going to be a turtle tank also?
User avatar
Kallistos
 
Posts: 1030
Joined: Aug 17, 2006
Location: Wisconsin
Gender: Male

Post Posted: Wed Jan 24, 2007 9:09 pm   

RESowner34 wrote:Wow! How unbelievably lucky you are! I mean he could have sold it easily for a $100. At least I'd buy it at that price. Is it going to be a turtle tank also?


LOL It was pretty funny actually. He said, "Give me a hand with this tank" so I grab one end, thinking we're going to put it in his truck, and he starts pulling his end towards the dumpster! I said, "Whoa! Where are you going?" and he says, "To the dumpster, stupid, where'd you think I was going?"
All because it had a little chip you could hardly notice.....So I got it home, filled it all the way up, and it doesnt leak at all!
User avatar
grey goose
Senior Member
 
Posts: 1941
Joined: Jul 12, 2006

Post Posted: Wed Jan 24, 2007 9:39 pm   

cusm wrote:Make sure and take lots of pics and don't skip any details. Now you are making me really itch to get a jump on our next tank (probably a 50g or 65g) but I must wait until we move. I really like the look of these new ramps, how much would you charge to make and ship a set?


I don't think I could make up a set unless I had the tank in front of me.....too many variables.
It's really not all that hard! Tedious yes, but not hard. A little careful planning, a little patience, maybe some trial and error. On my 90 gal I switched out the ramps three times before I settled on this layout. But the materials used are relatively cheap (a sheet of 1/4" acrylic is about 30 bucks, and it's probably enough to make the ramps AND covers on a 55-60 gal......
Is there anything in particular you want to see picture wise?
Here's' some shots of the ramps. On this setup they go all the way across the tank:

Image

Unlike my old setup, both ramps are removable:

Image

I cut 1" strips and glued them in place with silicone. I tried using epoxy, but it looked awful, as long as you press all the air bubbles out between the acrylic and glass, it will hold firmly for many years. I put one piece up top as a "slot" so the ramp slides into it:

Image

A shot of the resting ramp. It sits 3" under the waterline. See that small piece of acrylic on the right? that serves as a "stop" so the ramp can't go anywhere. In the corner is a cutout for the intake tube:

Image

In the other corner I set up some larger rocks so a turt could sort of lean on them and get his nose above the water. As they grow, they won't need to do this:

Image
User avatar
grey goose
Senior Member
 
Posts: 1941
Joined: Jul 12, 2006

Post Posted: Thu Jan 25, 2007 9:43 am   

Are you getting another turt grey? :mrgreen: :D
User avatar
N4784N R4613
 
Posts: 1340
Joined: Jul 18, 2006
Location: Phila. PA.

Post Posted: Thu Jan 25, 2007 4:40 pm   

WHAT??!!?? :shock: No, no new turts here! I've got my hands full with these three...... :)
This 55 is going to be the "time-out tank" in case one stops getting along or doesn't play well with the others. But eventually, I may set it up over at my nephew's place and give him one to care for. He takes care of them for me when I go on the road for short periods....I'm a little suspicious of his feeding technique though, when we both stand in front of the tank, all three swim directly over to him and start begging furiously! Hmmmm.
User avatar
grey goose
Senior Member
 
Posts: 1941
Joined: Jul 12, 2006

Post Posted: Thu Jan 25, 2007 8:15 pm   

How did you get the bend in the ramp? What did you use to attach the rocks? And how did you apply it? Thanks again for great ideas.
cusm
 
Posts: 24
Joined: Dec 18, 2006
Location: Oklahoma City

Post Posted: Fri Jan 26, 2007 10:43 pm   

the setup was great
viront
 
Posts: 64
Joined: Jan 21, 2007

Post Posted: Sat Jan 27, 2007 2:30 pm   

Creating the bend requires heat. Lots of it. You've got to get acrylic up to about 200-250F in order for it to bend. I used a borrowed heat gun, the kind they use to remove old paint.
Here's a link to show you what it looks like:
http://www.toolbarn.com/product/milwaukee/8977-20/
Most tool rental places will let you have one for the day for around 10-20 bucks......
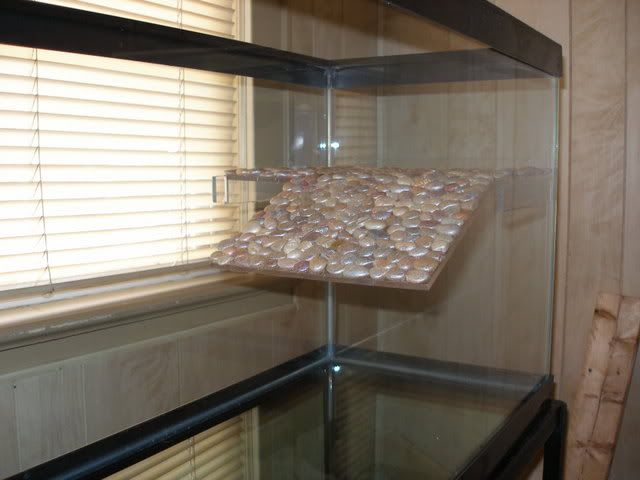
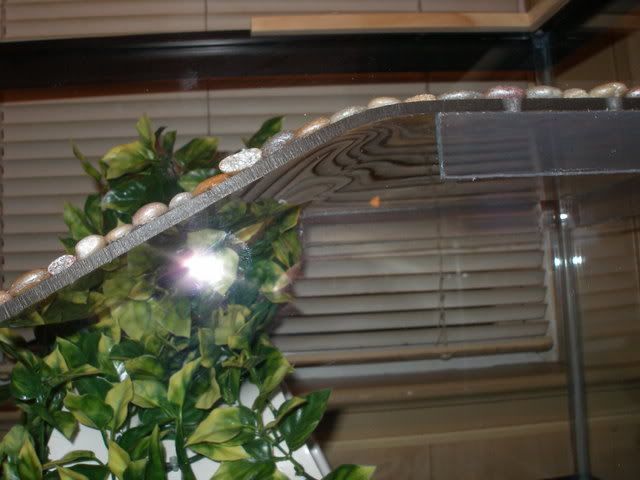
After you cut it to fit, but before you glue the rocks in place, put it on a flat wooden surface (not metal, it will absorb the heat) with the ramp section hanging over the edge. Then heat the area you want to bend ONLY. Keep the gun moving, don't hold it in one spot or you may distort it. Once you think its hot enough hold the flat part firmly against the surface and press down on the ramp. (Wear gloves). Use slow, steady pressure for about a minute or so, then release and check your bend. Keep doing this until the bend is where you want it. Remember, heat it just enough so it will bend, but not so much that it will distort or start to melt.......I haven't measured the angle on my ramps, but it looks like it's around 20-25 degrees.

Image

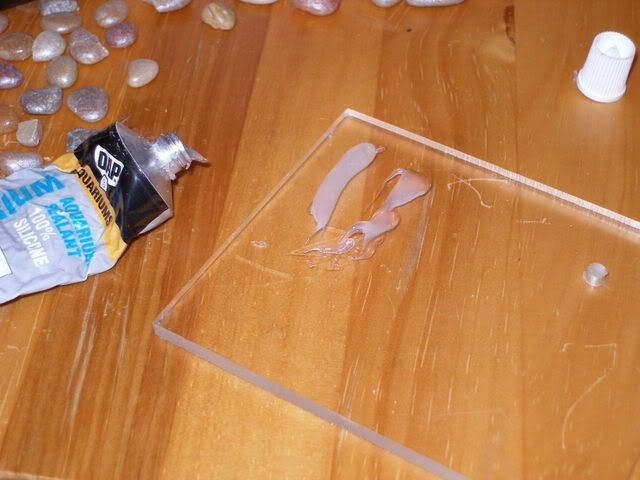
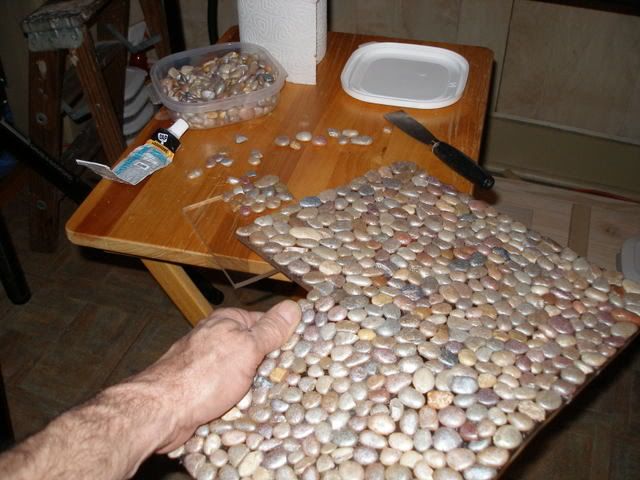
I used silicone to attach the rocks to the ramps. Clean them with denatured alcohol first. Don't worry about cleaning the rocks, just rinse them under tap water, and let them dry out completely.
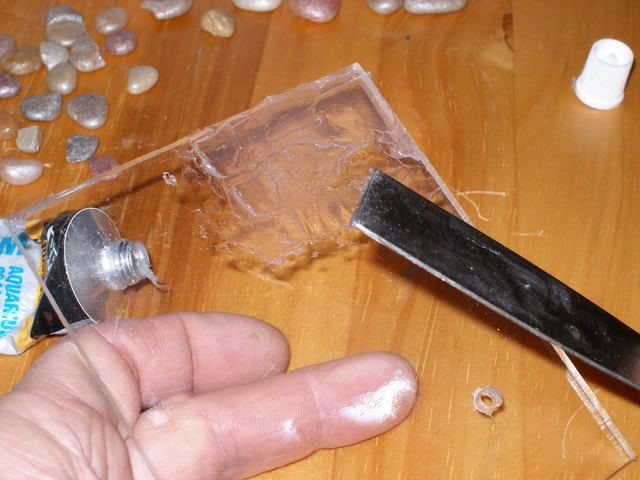
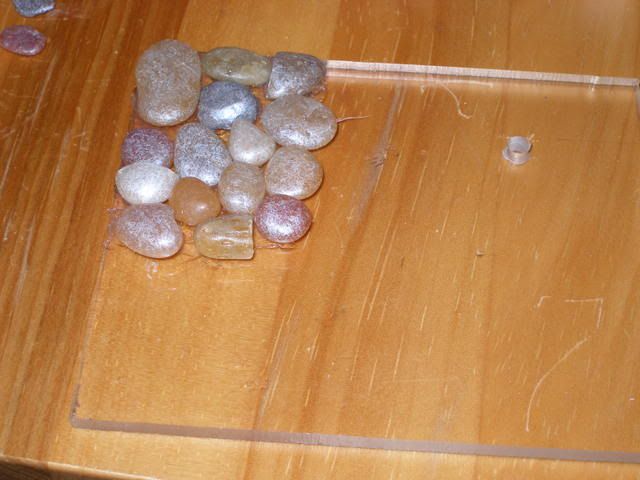
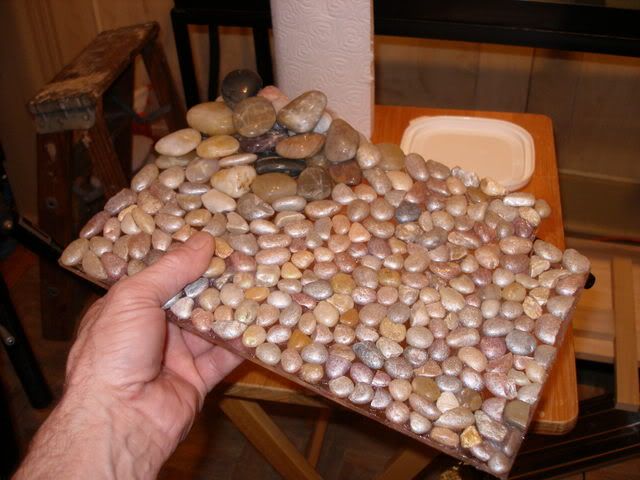
First I ran a couple of beads of silicone, then spread it with a small putty knife (kind of like icing on a cake). Don't spread it too thick, or too thin. Also do a small section at a time! Although silicone takes 24 hours to cure, it starts to "set up" after about 10 minutes. Do an area about 3"x 3".

Image
Image

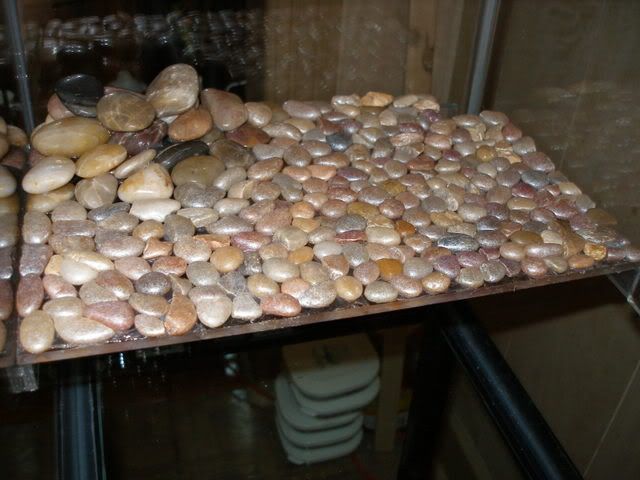
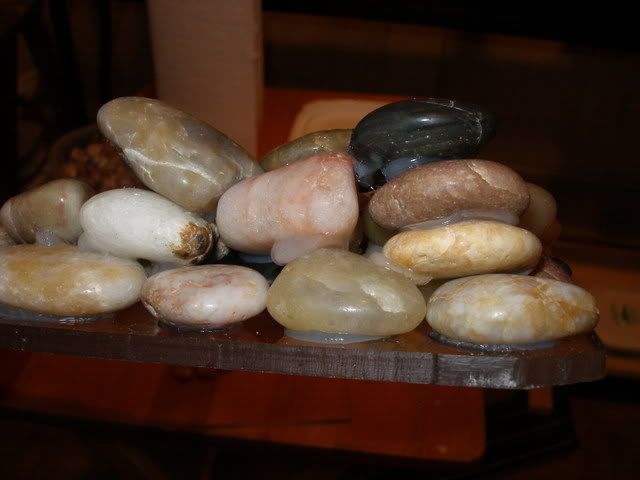
The rocks I used are just those tumbled stones available at most pet stores. Pick out the ones that are flat and smooth, don't use any that are jagged or have sharp edges:

Image
Image
Image

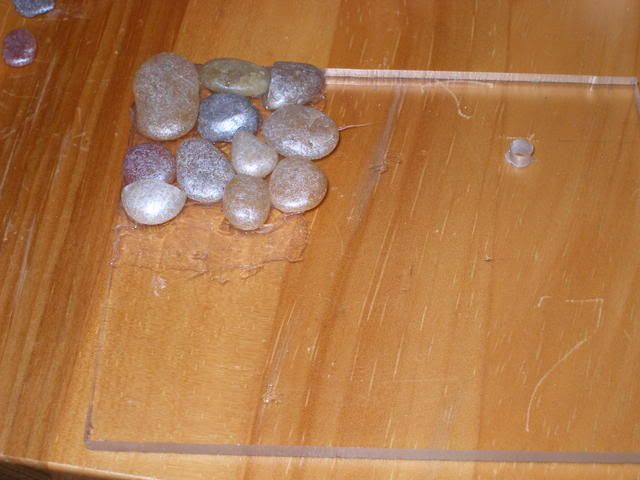
As you press them in place try to avoid sliding them around or readjusting them, (there is going to be gaps, there is no avoiding it) and once you finish, leave it alone for at least 24 hours!

Image

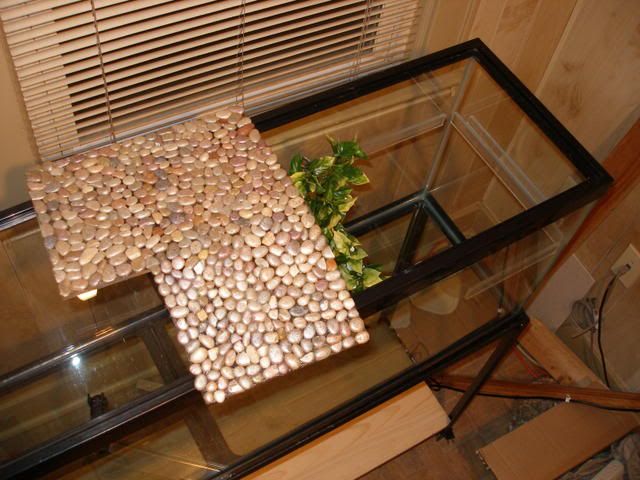
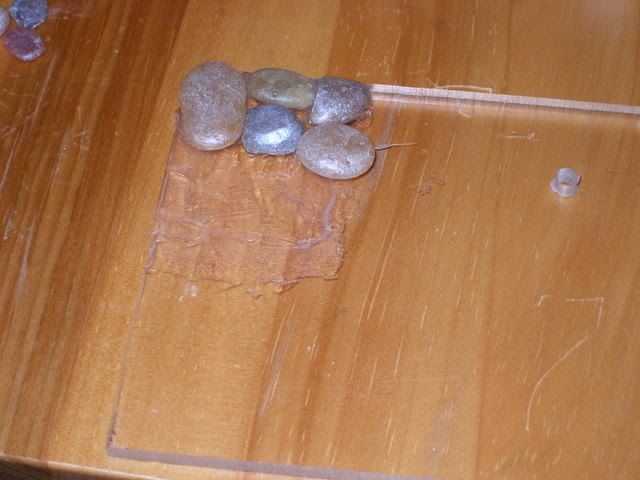
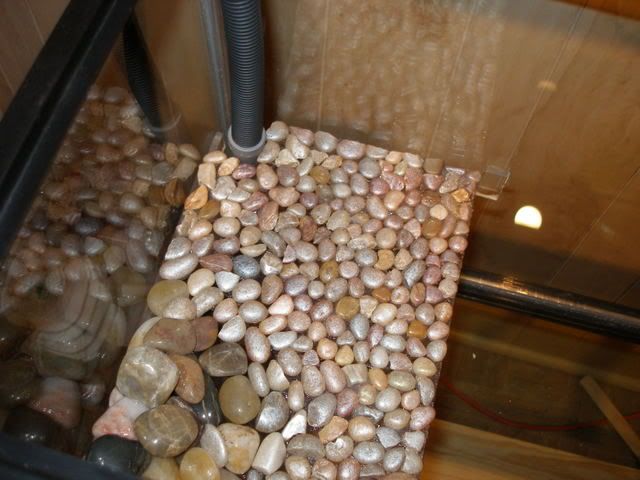
Here's a rear shot of the resting ramp showing how the large rocks were set in place. Set them up first and work your way out using smaller rocks as you go. Use the silicone only at the contact points on the large rocks. If things get messy, don't try to clean it, you'll only smear it. Wait till it's dry and trim with a razor. Also note the rounded corner. You'll have to do this to avoid having the ramp make contact with the seal inside your tank.

Image
Image

One more note. If you plan on using a canister filter, make sure to cut out a section for the hose to go through.

Image

Good luck! :)
User avatar
grey goose
Senior Member
 
Posts: 1941
Joined: Jul 12, 2006

Post Posted: Sat Jan 27, 2007 2:36 pm   

Wow, that looks really time consuming, but beatiful! I hope one day I'll have the handicraft skills to do something like that. Well, I guess it's not as hard as it looks. What was the total price of all those supplies?
User avatar
Kallistos
 
Posts: 1030
Joined: Aug 17, 2006
Location: Wisconsin
Gender: Male

Post Posted: Sat Jan 27, 2007 3:18 pm   

Each ramp takes about 90 minutes to 2 hours to complete. As far as costs for the 55 gal., the tank and stand was free (I saw one on sale recently for 89.99, tank and stand). I have an old Fluval 404 for filtration, (they don't make them anymore, but the 405's cost 169.00, not worth it, IMO). The rest of the materials were leftovers from the 90 gal. build. The only cash I spent was for lights, a sheet of acrylic, one of those hanging plants, and a small pcv pipe and some hardware. I probably spent about 50-60 bucks.
The 90 gal. setup is a whole 'nuther story.....I'm afraid to add that one up. :roll:
User avatar
grey goose
Senior Member
 
Posts: 1941
Joined: Jul 12, 2006

Post Posted: Sat Jan 27, 2007 5:05 pm   

It is very pretty, the stones look incredible! It's also great that you're ready in case the kids decide to fight. I am getting a 120 gallon tank, but I am keeping the 75 gallon too, in case they don't always get along this well. I hope they always do, because I don't relish the idea of cleaning 2 tanks. Of course, you already do that, so tell me it isn't so bad to clean 2 tanks all the time! I don't want to think about the amount I have spent in the last year either. I am afraid I might kick my own butt for the amount.
2 RES-Sparky M 6.0 and Spike F 9.0
1 Beardie- F Nubbin
1 Pictus Gecko- F Necko
6 Fire Bellied Toads-3 M 3 F
User avatar
scripta_elegans
Senior Member
 
Posts: 1938
Joined: Jul 30, 2006
Location: Iowa

PreviousNext

Return to Photo Gallery

Who is online

Users browsing this forum: No registered users and 8 guests