Photo Gallery :: New 90g/40g "L"-shaped tank setup

The place to post your photos and pictures.
Winter Photo Contest Winner :mrgreen:

Post Posted: Wed Aug 01, 2007 12:15 am   

Wow look really great
~*2 RES*~
User avatar
Josie1023
 
Posts: 142
Joined: Apr 15, 2007
Location: Edmonton AB

Post Posted: Wed Aug 01, 2007 1:56 pm   

It's lookin' really cool so far! Good job!! :)
2 Gerbils :Ichigo & Hitsugaya
1 German Shepard :Joey
1 RES :Mini-Fred (aka Fred II)

1 RES named Fred : Made it to "Paradise" July 12th 2007 (RIP Fred, you were my best friend)
RES Lover For LIFE
User avatar
ParadiseTurtle
 
Posts: 19
Joined: Jul 22, 2007
Location: Dallas : Texas

Post Posted: Wed Aug 01, 2007 2:07 pm   

Wow David, that's looking great! Your turtles are going to love it and it will make a great display piece.

I like that wicked saber toothed tiger skull too.
SpotsMama
User avatar
SpotsMama
Retired Mod
 
Posts: 8079
Joined: Jun 7, 2006
Location: Mesquite Texas

Post Posted: Wed Aug 01, 2007 7:39 pm   

I like that big snake skull. Very cool.....
"Make it turtle proof, and they'll build a better turtle."
User avatar
grey goose
Senior Member
 
Posts: 1941
Joined: Jul 12, 2006

Post Posted: Wed Aug 01, 2007 8:34 pm   

David, that looks awesome!! It's amazing how much effort you are putting into this project. It's going to look awesome when you're finished.


Just keep swimming, just keep swimming.
~Christi
1.0 RES: Mikey R.I.P.
1.0 Het for Albino Red Tail Boa: Kaa ~adopted out
0.0.1 Northern BTS: Petri ~now a well-loved class pet

1.0 Am. Staff Mix: Brutus R.I.P.
1.0 German Shepherd: Pax

1.0 Husband: Will
0.1 Daughter: Lily
User avatar
untsmurf
Senior Member
 
Posts: 4291
Joined: Jul 28, 2007
Location: Carrollton, TX
Gender: Female

Post Posted: Wed Aug 01, 2007 9:52 pm   

He he, thanks! Altogether I think I'm into it about 20 hours total. I just work on it 1 or 2 hours at a time here and there. The last two weekends I did a couple of 4 hour days but that's about it. My real job is programming so I sit and work on a computer all day and then I spend an hour or two each day on here :roll: so whenever I get a chance to work with my hands I really enjoy it. :)

I finished the basking platform on the 90gal today so they are all moved into that tank for now while I finish the ramp and live plant shelter in the 40gal. I'll get some more pictures up later this week.
User avatar
DavidY
 
Posts: 4391
Joined: Mar 9, 2007
Location: New Hampshire
Gender: Male

Post Posted: Tue Aug 07, 2007 12:21 am   

I really LOVE this and I think I'm going to attempt to build it. I have 3 RES and they would love all of that space. Do you have any pics of the completed project? I'd love to see them for further ideas.
THANK YOU SO MUCH!!!!
turtlelover95
 
Posts: 23
Joined: Aug 4, 2007
Location: Minnnesota

Post Posted: Tue Aug 07, 2007 1:55 am   

i cant wait to see it finished ive been waiting for weeks now.
every time i see this thread pop back up i get filled with exictement thinkign i am goign to see finished pictures of the setup only to read that it is still goign on . i cant wait to this this project finished .
its been fun seeing it unfold.
twiggy (res)
fiddler crabs - 4
henrey - paddle tail newt
sean rose
 
Posts: 141
Joined: Jul 5, 2007
Location: voorhees new jersey

Post Posted: Tue Aug 07, 2007 2:13 am   

WHOA!! REALLY awesome! You can call it the Turtle Corner or something.
2 Chinese Goldenthread turtles ~ Miso&Mafan
1 Chinese Box turtle ~ Chief Lemon
2 Redfoot Tortoises ~ Sheegua & Muugua
1 Toy Poodle ~ Pudding
3 firebellied newts ~ Cassandra, Mr.Poo, and Wiggles.

http://flickr.com/photos/the_naturalist
User avatar
Tenodera
 
Posts: 2886
Joined: Mar 5, 2007
Location: Taichung, Taiwan

Post Posted: Tue Aug 07, 2007 10:22 am   

he he thanks! Yea it's just about done now. I've opened up the new tank for them to explore. The common basking platform is done as well as the ramp in the 90gal from the basking platform to the submerged platform. I put a temporary ramp into the 40gal so they could go back and forth while I finish working on the live plant cage, but they kept knocking the ramp off, so they are confined to the 90gal for now. I'll have to post some more pics soon. :)
User avatar
DavidY
 
Posts: 4391
Joined: Mar 9, 2007
Location: New Hampshire
Gender: Male

Post Posted: Mon Aug 13, 2007 12:15 pm   

Okay so my turtles have been enjoying their newly expanded L-shaped setup for a while now. I just haven't had a chance to get the pics uploaded and posted. So here goes...

You can see the new basking deck on the 90gal and the ramp. The deck is made out of a 16"x16" piece of ceramic tile glued to two thick strips of glass using silicone sealant. I had to use the glass strips because the width of the frame was 16.5". :?
Image

I had setup a temporary ramp from the original basking platform in the 40g to the new basking deck but they keep knocking it over. I will make a permanent ramp once I get the live plant cage built.

Here are the two boys on the new deck...
Image
User avatar
DavidY
 
Posts: 4391
Joined: Mar 9, 2007
Location: New Hampshire
Gender: Male

Post Posted: Mon Aug 13, 2007 12:35 pm   

Wow that looks great!! It looks like your turts are really enjoying themselves.

So there's going to be a ramp coming from the smaller tank too? Just be careful that they don't scratch their shells going into the 40 gal before the ramp is set up.

Have you decided to stick with the forest background?

One other thing, you might want to consider getting a better thermometer. Those ones that stick on the outside aren't that reliable. I mean come on David, you should know better :lol:
~Christi
1.0 RES: Mikey R.I.P.
1.0 Het for Albino Red Tail Boa: Kaa ~adopted out
0.0.1 Northern BTS: Petri ~now a well-loved class pet

1.0 Am. Staff Mix: Brutus R.I.P.
1.0 German Shepherd: Pax

1.0 Husband: Will
0.1 Daughter: Lily
User avatar
untsmurf
Senior Member
 
Posts: 4291
Joined: Jul 28, 2007
Location: Carrollton, TX
Gender: Female

Post Posted: Mon Aug 13, 2007 12:48 pm   

The next step was to make the cage to hold the live plants and shelter any live minnows in the 40gal tank. It would also be the base for the ramp up to the common basking deck. Since the cage wall had to extend from one side of the tank to the other, it would have to be detatchable from the base in order to get the whole thing in there past the lip of the tank frame. I also wanted to be able to easily take it apart for removal and cleaning if necessary.

I started with an old plastic lid from one of those plastic storage tubs. Image

I was just the right size and also had a set of locking tabs that would I incorporated into the design nicely. I drilled several holes all along the lower sides of the cover to allow some good water flow through the gravel bed for the plant roots...
Image

Next I superglued some tabs to the cage wall so it could be hooked to the front edge of the base...
Image
Image

Then I went to making the supports for the cage wall so it would remain upright and not get knocked over by the turtles. I cut out a piece of eggcrate that would eventually be glued to the cage wall and then extend back to hook under the locking tabs on the base. I measured the distance from the front edge of the base to the tabs on each side and then used a dremel tool to cut a groove into the eggcrate so the tab could lock into it...
Image

I then superglued the first piece to one side of the cage wall...
Image

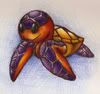
Of course Nermel insisted on testing each piece to make sure it was strong enough to use around turtles. :roll: :D
Image

Once it met with her approval I locked the cage wall into place on the base. You can see in the circled area on the left where the piece fits into the locking tab and the circled area on the right where the tab on the cage wall hooks over the edge of the base...
Image

and here's the finished product...
Image
Image

Now I just had to let it sit and dry before i could put it in place, add the gravel and live plants, and make the ramp to go above it.
User avatar
DavidY
 
Posts: 4391
Joined: Mar 9, 2007
Location: New Hampshire
Gender: Male

Post Posted: Mon Aug 13, 2007 12:54 pm   

untsmurf wrote:One other thing, you might want to consider getting a better thermometer. Those ones that stick on the outside aren't that reliable. I mean come on David, you should know better :lol:


he he...yea I know. I have an infrared hand held thermometer that I use to check the temps in all my setups and it's accurate to one-tenth of a degree. The stick on ones are accurate to roughtly +/- 3 degrees but they give me a quick peek to make sure the heater's not stuck on or anything. I do have a couple of remote digital thermometers but I have them in other setups right now and the one for the turtle tank is in my incubator. During the summer my basement stays a steady 75 to 78 degrees and I unplug the heaters so they're safe right now. :)
User avatar
DavidY
 
Posts: 4391
Joined: Mar 9, 2007
Location: New Hampshire
Gender: Male

Post Posted: Mon Aug 13, 2007 1:00 pm   

I have a silly question. How do you cut that eggcrate stuff? What did you use? I need to add a piece of it to Donatello's basking area as use for a ramp.
RES, Nicaraguan slider, Chinese Golden Thread, Northern DBT, Eastern Painted, Gibba turtle, Leopard tortoise, 3 Central American Woods, 2 Home's Hingeback tortoises, False Map, Northern Map, 2 Pink bellies, Reeves
User avatar
lotsofpets
 
Posts: 439
Joined: Sep 5, 2006
Location: Lexington, KY

PreviousNext

Return to Photo Gallery

Who is online

Users browsing this forum: Google [Bot] and 16 guests