Habitat - Indoor :: New Habitat

Turtle tank setups and other indoor configurations.

Post Posted: Tue Feb 24, 2015 10:06 am   New Habitat

Hello.
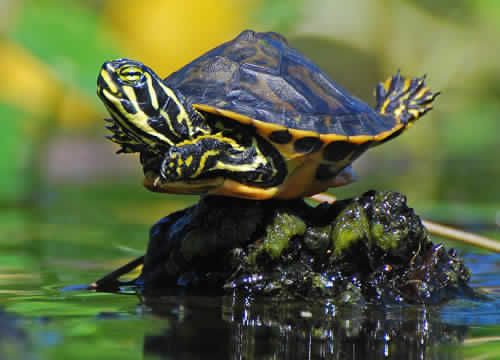
New to the forum for the most part. I have one female res named Notchie. (She had a chip out of her shell behind her neck and we wanted an androgynous name.) I am going to be building a new habitat for our turtle. I included a couple pics of my tank when it was new and the stacked turtles in our outside pond.
My problem is that my existing tank has developed a crack in the bottom all along the front edge where the bottom reinforcing starts. Not leaking yet. I have gone through the possibilities of repair but have decided that it was time to make improvements. I was going to go with a custom drop in polypropylene 45mil liner, roughly 3'x7'x18" deep. That cost ran up to about $350 so now I am reconsidering. A new tank like I have now is $200 which works, but is not ideal.
Some of the improvements that I would like to make are: Put in a bottom drain. Slope everything towards the drain. These 2 are to make the tank easier to clean. I have a floor drain that the tank could drain into. Put in a sunning beach off to the side or end to free up tank space. Get the pump out of the tank. Make the shape more rectangular to facilitate the installation of a tank top. (Currently I have a sheet of plastic over the tank to keep heat and humidity in.)
The turtle setup is in my shop that is attached to the house. I keep the shop at 60 degrees in the winter. The pond temp is about 78.
Are there other features that I should think about incorporating? I am currently thinking about making a form/support out of wood and fiberglassing a tank. That lets me do almost any shape and it doesn't have to be extremely pretty.
So just looking for ideas/features to incorporate. Thanks.
Attachments
stack.jpg
tanktop.jpg
tank front.jpg
kermath
 
Posts: 30
Joined: Feb 22, 2015

Post Posted: Tue Feb 24, 2015 3:02 pm   Re: New Habitat

There was a member making their own fiberglass tank, but hasn't updated lately. I think you have most of the ideas I would have covered. What kind of filter are you going to use? I've seen a few boxed out stock tanks and preformed ponds that look great, I think yours will too. Are those casters able to support the weight?
User avatar
steve
Site Admin
 
Posts: 31561
Joined: Apr 11, 2005
Location: New York, NY
Gender: Male

Post Posted: Tue Feb 24, 2015 3:05 pm   Re: New Habitat

I hope I don't sound ignorant here, but why isn't a 300 gallon stock tank ideal for you? It looks like you already have a filter set up, and you could support it with a layer or two of bricks. If you want to add a sunning area, you'd might as well make it an egg-laying area too. You could elevate a 50 gallon stock tank to the height of the tub (assuming you fill it all the way or make an easy-to-use exit ramp) with another support and then incorporate it into a frame connecting it to the water area.
Jeremiah
 
Posts: 575
Joined: Jun 7, 2013
Gender: Male

Post Posted: Tue Feb 24, 2015 4:56 pm   Re: New Habitat

The filter I am using right now is a Hayward ec60 pool filter. I am driving it with a 1000gph pump that maintains about 10psi at the inlet of the filter. The filter works great I clean it out once a year. There were 4-4 wheel dollies under the setup until I needed them elsewhere. They did ok. 300 gallon tank with about 200 gallons in it. Around 2000 lbs total.
The strikes against the current tank are that it is cracked. It has a flat bottom and no bottom drain. It is an oval which is a waste of space if you are trying to get a certain amount of gallons in a certain space. The material that it is made from also does not lend itself to mods. Nothing sticks to it so it is bulkhead fittings or nothing. On the good side it is sturdy and realitively inexpensive. Way better than aquariums.
Cleaning is where a new tank would be awesome. Currently we pump the tank down as far as it will go. Then we put another pump in to get down to about a half inch of water. Then we use the shop vac to suck up the remaining water and the several rinses. It takes about an hour. If I had a tank that had a bottom that sloped to a drain that was connected to a floor drain cleaning that tank would amount to opening a valve to drain the tank. Spray out the tank with a hose and watch the stuff go down the drain. Probably a 5 minute job. No pumps to monitor. No equipment to get out.
The current basking area in the middle of the pond works ok. I did have a beach extension off to the side for a couple years but Notchie wasn't really interested and laid eggs in the water.
The best part about this is that I am not a turtle guy. We got the turtles to go in the outside pond and found out that they would not survive the winter. So inside pond. Also found out that outside pond doesn't get warm enough even in the summer so year round inside turtle. She will probably outlive me so rather than accidentally dropping a toaster in the pond we feel this moral obligation to take care of her. And now we are protective and are worried that she would get mistreated if we gave her away. She has actually come out of her shell a little as it were this past year. The first 4 years she would always dive if she saw you. Now she actually stays out if you come up to her.
kermath
 
Posts: 30
Joined: Feb 22, 2015

Post Posted: Tue Feb 24, 2015 5:20 pm   Re: New Habitat

They have magnetic replacement "suction" cups that might work for you. Drilling holes and notches into the rim is also doable. I'm surprised this doesn't already have a drain plug. You also don't need to completely drain the tank or do a complete water change.

Older turtles can tolerate colder temperatures. Some keep their water temps in the mid-60's.
User avatar
steve
Site Admin
 
Posts: 31561
Joined: Apr 11, 2005
Location: New York, NY
Gender: Male

Post Posted: Wed Feb 25, 2015 10:27 am   Re: New Habitat

Thanks for the input. We are kind of straying from my question. I am not asking how to make my existing tank work, I am asking what features to incorporate into a new setup. Things like beach size, do turtles like waterfalls?, type of uva,uvb fixture, plants. etc. I could take my tank, do some plastic welding on the bottom to repair the crack, cut a hole in the bottom for a drain fitting, jack the tank up on one end a little so that the water goes towards the drain. But what fun is that? I am looking at this as a fun project rather than an act of desperation.One of my other issues is the cover over the tank. I have attached a pic of it pulled back a little. It gets pretty gross. If I reworked the lighting and the plumbing I could do a better job of sealing up the back area. So again, if I am going that far why not do it as good as I can? The plastic needs to end up inside the tank so that when water condenses and runs down, it goes back in the tank and not on the floor. The plastic is only partially for the turtle. My attached shop is 1500 sq ft and built with the same wood windows as the house. High shop humidity in the winter means tons of condensation on the windows and doors. Windows rot and the door locks freeze and or break. So keeping the tank covered well and running a dehumidifier full time keeps the condensation down. I figure that I use about $25 worth of electricity a month between lights, heater, pump, dehumidifier. There is a tremendous domino effect in your life when you buy a $10 turtle.
And a correction. my filter is a Hayward ec65 not 60. (in case you google it)
So at present my plan is to stay inside a 4x8 footprint. Have the whole assembly on casters. Have a solid cover over the entire tank with a glass front that opens. Form the tank out of wood then epoxy/fiberglass it. Tank shape tbd this weekend. I'll take pics as I go. I like full size CAD to help visualize things and of course I need Notchie's input although I am thinking that if there are worms and it is warm she'll be happy.
As an aside, I do like projects. I have attached a pic of the timber frame shed that I built last winter / summer. My wife usually thinks that I am nuts.
Attachments
003 (1280x960).jpg
unnamed (2).jpg
kermath
 
Posts: 30
Joined: Feb 22, 2015

Post Posted: Wed Feb 25, 2015 11:08 pm   Re: New Habitat

Have you looked into plywood tanks? Features... lets see. Beach size doesn't matter too much, they just need enough room to bask and move around a bit so they can choose their temperatures. They don't care for waterfalls, plus that would make the water evaporate rather quickly. You only need a small amount of surface agitation. Get a MVB (ReptileUV-Mega Ray) and have some way to adjust the height. A protective screen is optional (grid spacing of about 1/2"). Plants look great, but do want to have them for decoration, food, or both?

I'm not sure what to do about the cover. What about a cabinet around the tank? The glass lid would look pretty nice too. That shed looks great, I can't wait to see your progress with this project.
User avatar
steve
Site Admin
 
Posts: 31561
Joined: Apr 11, 2005
Location: New York, NY
Gender: Male

Post Posted: Thu Feb 26, 2015 9:24 am   Re: New Habitat

I am thinking that the tank will basically be plywood with an epoxy lining. Right now I have screw in uvb and heat lamps. I am thinking about going to a 24" or 36" flourescent for the uv. The bulbs don't look to be more expensive and they are lower profile and cover more area than a screw in. Any preference for these?
The plants are kind of a maybe at this time. Notchie likes to hide in plants. Seeing as how she has been more social as of late we would take her outside for walks. We have a small garden between our front porch and front side walk, maybe 3' x 16'. When we put her in there she disappears. We have 2 fences going around that area to keep her in and there are still times when we would swear that she had escaped.
The cover ends up being pretty tall. If the basking area is at pond level or higher and you put lights above that with some clearance I am around 18"-24" high. I was debating about carrying that height all the way across the pond or just over the beach. Either way there is going to be glass involved. Plexi costs a ton and it scratches, glass isn't cheap either. However, if you go to your local Habitat for Humanity Store, they have used storm doors. For $20 you can pick up a door with a piece of tempered glass about 30"x72" plus the frame. Right now that cover may be horizontal or vertical, hinge at the top or bottom, slide straight up or lay over the tank with hinges to the rear.
For those that are curious about the cost. So far: Wood $150, Casters $50, Epoxy and cloth $200, Storm door $20. That leaves lighting, paint, plumbing and ? to go yet.
kermath
 
Posts: 30
Joined: Feb 22, 2015

Post Posted: Thu Feb 26, 2015 4:58 pm   Re: New Habitat

Reptisun tubes have a good reputation but you will still need a separate fixture for heat lamp. Some prefer an MVB (Mega-Ray) in larger setups.

For areas that you do not to see-through, what about corrugated plastic or roofing plastic? I don't know anything about epoxy, but isn't the wood figure high?

As for having her outside, don't forget that she can dig very well too. RES are pretty good escape artists.
User avatar
steve
Site Admin
 
Posts: 31561
Joined: Apr 11, 2005
Location: New York, NY
Gender: Male

Post Posted: Fri Feb 27, 2015 11:26 am   Re: New Habitat

The wood is 2 sheets of 3/4 plywood, 10-2x4s and 10-2x6s. When you see the construction you'll how they get used. This is more than a tank. It is a mobile turtle habitat platform. I should work on an acronym. The mothp doesn't seem right.
Notchie did dig last summer when she was out and did escape. It looked like she went through holes that were smaller than her shell. Still not sure how she did that. Ron
kermath
 
Posts: 30
Joined: Feb 22, 2015

Post Posted: Fri Feb 27, 2015 1:21 pm   Re: New Habitat

I have thought about adding a waterfall to my tank made out of rock. Maybe this spring I will work on one. I think that would be cool in your new tank.
1 Male Mississippi Map/Mississippi
1 Female RES/Slidy.
1 DBT White Concentric Female/ Lucky
1 DBT Male/ Spots
(Housed in the same tank)

300 gallon indoor stock tank, FX6 & FX5 filters. Mega-Ray 100w UVB bulb.
User avatar
Kansasslider
 
Posts: 3043
Joined: May 10, 2012
Location: Manhattan,Kansas.
Gender: Male

Post Posted: Fri Feb 27, 2015 5:46 pm   Re: New Habitat

That was kind of why I was asking. When we clean Notchie's tank and start refilling, she always goes and sits under the hose. I got pretty far on the new setup today. The tank is pretty much 42" x 78" inside. I have pics that I'll try to post later. I have commitment issues so I don't want to build in anything that I am not totally sure about. I can always add to the structure after it is done now that it is going to be fiberglass/epoxy. Seeing as how it will be enclosed in the winter I am not too worried about evaporation. I might put in an auto fill feature so the water stays where it should. The way I am set up now, if the water goes down an inch, Notchie can't make it onto the ramp to get to her basking rock.
kermath
 
Posts: 30
Joined: Feb 22, 2015

Post Posted: Fri Feb 27, 2015 6:13 pm   Re: New Habitat

This is what I got done today. I should do the plywood liner tomorrow and then the epoxy/fiberglass. The open end of the platform is where the filter, pump and worm farm go.
Attachments
002 (1024x768).jpg
004 (1024x768).jpg
007 (800x600).jpg
008 (1024x768).jpg
kermath
 
Posts: 30
Joined: Feb 22, 2015

Post Posted: Sat Feb 28, 2015 3:06 pm   Re: New Habitat

Wow, you work fast! This looks like an incredible upgrade. When you are refilling, what temperature is the water? And did she dig to hide or to escape? They can do either.
User avatar
steve
Site Admin
 
Posts: 31561
Joined: Apr 11, 2005
Location: New York, NY
Gender: Male

Post Posted: Sat Feb 28, 2015 6:23 pm   Re: New Habitat

I think Notchie dug for pleasure rather than escape. Our soil puts up a fight when it comes to digging.
I usually put water in the tank at about 72 degrees. It usually takes 2 shots. The water heater runs out of hot before the tank is full. About 200 gallons. The new tank has a max capacity of 300 gallons. I got the bottom ribs made today. The bottom slopes right to left and back to front so each rib was different and kind of putzy. I screwed down the bottom and puttied the holes. Puttying was not 100% necessary but I don't like voids when I am laying fiberglass. You also need to make sure your putty will not get eaten by the epoxy resin. I have the sides cut but not installed. I need to sand the bottom first. I don't have my fiberglass cloth yet so pretty soon I need to stop and wait for supplies. The old tank isn't leaking yet so I have a little time.
Attachments
002 (800x600).jpg
003 (800x600).jpg
004 (800x600).jpg
006 (800x600).jpg
kermath
 
Posts: 30
Joined: Feb 22, 2015

Next

Return to Habitat - Indoor

Who is online

Users browsing this forum: No registered users and 51 guests